.png)
Small Kitchen Remodel Ideas on a Budget That Actually Work
- Demian Fraga
- Jul 16
- 9 min read
Why So Many Homeowners Can Remodel Their Kitchen for Cheap (And Still Love the Result)
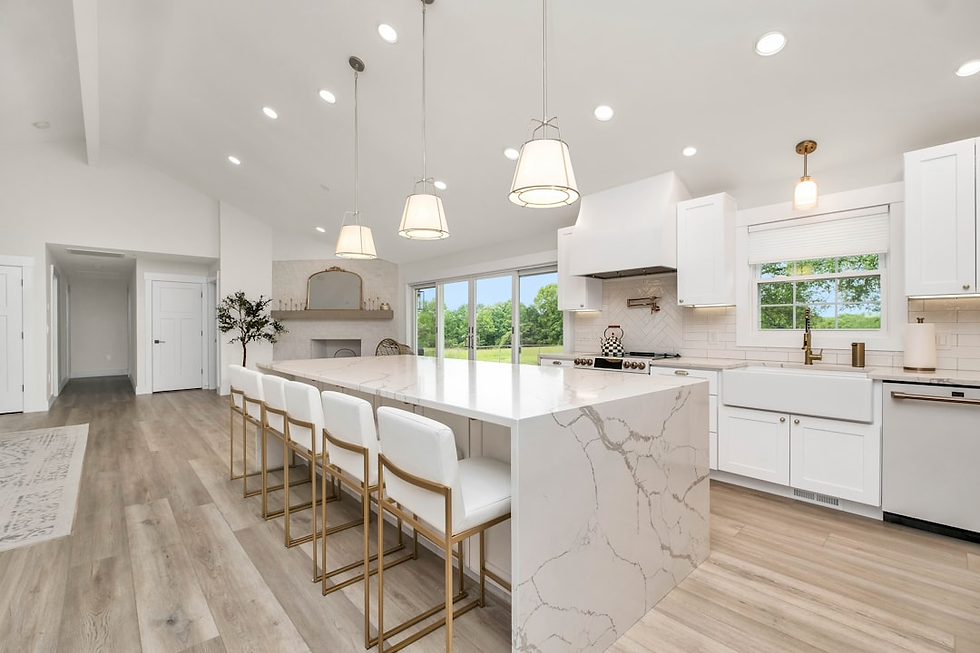
If you want to remodel your kitchen for cheap, here are the fastest ways to get a noticeable result without gutting the whole room:
Paint your cabinets — biggest visual change per dollar spent ($200–$600 DIY)
Swap hardware — matte black or brushed nickel pulls transform the whole look ($75–$300)
Add peel-and-stick backsplash — no grout, no tools, renter-friendly ($100–$350)
Upgrade lighting — under-cabinet LEDs and a new pendant make a huge difference ($80–$250)
Replace the faucet — a $150–$450 swap that looks like a full renovation
A full cosmetic refresh using all five updates above can cost as little as $575 to $1,850 total — and most homeowners can complete it over a couple of weekends.
Most kitchens don't need a gut renovation. They need smarter, targeted updates in the right order. A dated kitchen with functional cabinets, working appliances, and solid bones is often just a few weekends away from looking completely transformed. The difference between a $500 refresh and a $30,000 remodel is usually just knowing which parts to touch — and which to leave alone.
I'm Demian Fraga, a licensed residential builder in South Carolina with 13 years of hands-on construction experience helping homeowners figure out exactly where to spend and where to save when they want to remodel their kitchen for cheap. In this guide, I'll walk you through what actually works — from quick cosmetic fixes under $100 to phased upgrades that can take a tired kitchen all the way to $5,000 and beyond.

How to Remodel Your Kitchen for Cheap: The Three-Tier Budget Framework
Before you start tearing out cabinet doors or ordering samples, you need a realistic financial plan. In our years of handling home renovations across Upstate South Carolina, we have found that budget failures happen because homeowners do not match their expectations to their actual budget tier.
To help you plan, we use a simple three-tier framework. This categorizes the scope of your remodel based on what you want to spend and the return on investment (ROI) you can expect.
Budget Tier | Investment Range | Typical Projects Included | Expected ROI | Best Suited For |
Tier 1: Cosmetic Refresh | $500 – $2,000 | Cabinet painting, hardware swaps, peel-and-stick backsplash, faucet replacement, wall paint, and plug-in LED lighting. | 80% – 100% | Renters, starter homes, and quick weekend transformations. |
Tier 2: Fixture & Surface Upgrade | $2,000 – $5,000 | Professional cabinet refinishing or waxing, luxury vinyl tile (LVT) flooring, minor appliance swap (scratch-and-dent), and budget-friendly countertops. | 75% – 90% | Homeowners wanting a high-end look without structural changes. |
Tier 3: Strategic Renovation | $5,000 – $15,000 | Stock or ready-to-assemble (RTA) cabinets, laminate or quartz composite countertops, professional plumbing/electrical adjustments, and new tile. | 70% – 85% | Outdated kitchens requiring durable, long-term material upgrades. |
If you are working with a tight budget, focusing heavily on Tier 1 projects allows you to maximize your visual impact while keeping costs low. For those looking to dive deeper into financial planning and material substitutions, you can read more about these tiers in this detailed guide on Affordable Kitchen Remodel: Budget Strategies Under $15,000.
When planning your budget, we always recommend setting aside a 10% to 15% contingency fund. In older homes—whether in Greenville, Spartanburg, or Laurens county—opening up walls or removing old fixtures often reveals unexpected plumbing or electrical surprises. Keeping a small financial cushion ensures a minor surprise won't stall your entire project.
High-Impact DIY Projects for a Budget Kitchen Transformation
If you want to get the absolute most out of every dollar, rolling up your sleeves is the way to do it. Labor accounts for up to 50% of a professional remodeling bill. By tackling the cosmetic updates yourself, you save those funds to purchase better materials.

Step 1: Paint and Refinish to Remodel Your Kitchen for Cheap
Your cabinets occupy the largest amount of visual real estate in the kitchen. If they are dark, dingy, or sporting a dated orange oak finish, the entire room will feel tired.
Painting your cabinets is the ultimate high-impact, low-cost project. A high-quality DIY cabinet painting kit or premium paint and primer will run you between $100 and $300, saving you thousands compared to replacing the cabinetry.
To achieve a professional, durable finish that won't chip within six months, follow this proven process:
Remove and Label: Take off all doors, drawer fronts, and hardware. Number each door and its corresponding frame opening with painter's tape so you know exactly where they go during reassembly.
Clean Thoroughly: Kitchen cabinets accumulate grease, oil, and cooking residue. Scrub every surface with a heavy-duty degreaser like TSP (trisodium phosphate).
Sand: Lightly scuff-sand all surfaces with 120-grit to 220-grit sandpaper. You do not need to strip the wood bare; you just need to create a "tooth" for the primer to grip.
Prime: Apply a high-quality bonding primer. This is crucial for preventing wood tannins or old stains from bleeding through your topcoat.
Paint: Apply two coats of a high-quality, self-leveling semi-gloss or satin paint designed specifically for cabinets. Self-leveling paint helps eliminate brush strokes, leaving a factory-smooth finish.
If you have solid honey oak cabinets and do not want to paint them, you have a fantastic alternative: wax refinishing. Applying a tinted wood wax, such as Briwax, allows you to transform orange tones into a rich, modern espresso or warm brown while preserving the natural wood grain.
This method avoids the risk of paint chipping entirely and costs under $100 for materials. You can see a stunning real-world transformation using this exact technique in this DIY Kitchen Before and After — Our Budget Renovation.
Step 2: Install a Peel-and-Stick Backsplash
A beautiful backsplash ties your countertops and cabinets together. Traditional tile backsplashes require wet saws, mortar, grout, and a lot of patience. If you want to remodel your kitchen for cheap without the mess, peel-and-stick tiles are a game-changer.
Modern peel-and-stick tiles come in realistic materials like glass, metal, and heavy-duty vinyl that mimic traditional ceramic subway tile or marble. They are budget-friendly (typically costing between $3 and $14 per square foot) and fully removable, making them perfect for renters or homeowners who want an easy aesthetic update.
To ensure your peel-and-stick backsplash doesn't peel off over time, wall preparation is key. Wipe down the drywall with isopropyl alcohol to remove any grease or dust. Start your layout from the center of the wall and work your way outward, using a utility knife and a straightedge to trim the edges.
For a step-by-step breakdown of how a small kitchen was completely refreshed using these affordable backsplash hacks, check out How I Transformed My Kitchen for Under $100.
Step 3: Upgrade Countertops with Affordable Alternatives
Replacing countertops with solid granite or quartz can easily eat up $3,000 to $6,000 of your budget. Thankfully, you don't have to settle for stained, chipped laminate just because you're on a budget.
If your existing laminate countertops are structurally sound but visually dated, you can cover them using a specialty countertop refinishing kit. These epoxy-based paint kits can mimic the look of natural marble or granite for under $200.
Alternatively, heavy-duty adhesive contact paper in marble or slate patterns can provide a temporary, renter-friendly solution for less than $50.
For a more permanent and warm aesthetic, consider butcher block. Unfinished wood butcher block countertops are highly affordable—often costing less than $40 per linear foot at local home improvement stores. You can cut them to size with a circular saw, install them yourself, and seal them with food-safe mineral oil or a durable polyurethane topcoat.
To see how a homeowner successfully updated their existing surfaces and appliances on a strict budget, read this inspiring case study: I Transformed My Dingy Kitchen for Less Than $5K Using Easy DIY Hacks.
Small Details That Deliver Big Visual Upgrades
Often, it is the smallest elements in a room that date it the most. By focusing on the "jewelry" of your kitchen—the hardware, the lighting, and the plumbing fixtures—you can trick the eye into seeing a high-end space.

Low-Cost Lighting and Hardware to Remodel Your Kitchen for Cheap
Never underestimate the power of new cabinet hardware. Swapping out old, brassy knobs for modern matte black or brushed nickel pulls instantly modernizes your kitchen.
To save money, purchase hardware in bulk packs online rather than buying individual pieces at retail stores. Just make sure to measure the "center-to-center" distance between the existing screw holes so you don't have to drill new ones and patch the old ones.
Next, address the lighting. Dim, yellow lighting makes even the cleanest kitchen look dingy. Swap out old incandescent bulbs for warm-white LED bulbs (around 3000K) to instantly brighten the space.
You can also add under-cabinet task lighting without hiring an electrician. Battery-powered or plug-in LED puck lights and rope lights can be mounted underneath your upper cabinets using adhesive tape. This simple addition creates a warm, high-end ambiance and makes food prep much safer.
Finally, replace that basic builder-grade faucet. A sleek, high-arc pulldown faucet in matte black or champagne bronze can serve as a stunning focal point.
Before purchasing, check underneath your sink to see how many holes your current faucet uses so you can buy a compatible replacement. For more ideas on how these small details add up to a massive change, read through Cheap and Easy Kitchen Updates On a Budget That Make a Big Difference for Less.
Open Shelving and Vertical Storage Solutions
If your kitchen feels small, dark, and cramped, the solution might be to remove some of your upper cabinet doors. This simple, free trick creates instant open shelving, making the entire room feel larger and more airy. Paint the interior of the cabinet boxes a clean white or a subtle accent color, and display your prettiest dishes, glassware, and wooden cutting boards.
If you need to recover valuable counter space, look to your walls. Installing vertical storage solutions—like a wall-mounted pegboard for pots and pans, magnetic knife strips, or floating wooden shelves—keeps your counters clear and organized.
A real-world example of this approach can be found in a budget-friendly project where a homeowner built a custom workspace and added vertical storage to cure a cramped layout. You can read the full blueprint here: Budget Kitchen Makeover Ideas From a Real $800 DIY Project.
Planning Your DIY Timeline and Avoiding Costly Mistakes
A successful budget kitchen remodel requires careful planning. Jumping into a project without a clear sequence of tasks often leads to rework, wasted materials, and unnecessary stress.
To help you stay on track, we have compiled a checklist of essential tools and a step-by-step sequence to keep your project moving smoothly.
Essential DIY Tool Checklist
Before you begin, make sure you have these basic tools on hand:
Screwdrivers (flathead and Phillips)
Tape measure and pencil
Utility knife with extra blades
Spirit level (to ensure shelves and tiles are straight)
Sandpaper (120-grit and 220-grit)
Paintbrushes, rollers, and paint trays
Painter's tape
Safety gear (rubber gloves, safety glasses, and a dust mask)
The Ideal Kitchen Remodel Sequence
To avoid ruining freshly completed work, always tackle your projects in this order:
Declutter and Deep Clean: Remove everything from your countertops and cabinets. Clean all surfaces thoroughly.
Prep and Paint: Paint the walls and ceiling first, followed by your cabinet boxes and doors. This prevents paint splatters from ruining new surfaces later.
Install Backsplash: Apply your peel-and-stick or ceramic tile backsplash once the cabinets are dry.
Upgrade Countertops: Refinish or replace your countertops.
Install Hardware and Lighting: Mount your new cabinet pulls, faucet, and under-cabinet lighting.
Flooring and Finishing Touches: Lay down new flooring (like luxury vinyl tile) last, and bring back your styled decor.
One of the biggest mistakes you can make on a budget is trying to change the footprint of your kitchen. Moving plumbing lines, gas connections, or load-bearing walls requires professional permits, inspections, and expensive labor.
Keeping your existing layout and focusing entirely on cosmetic updates is the easiest way to keep costs low. If you are planning a broader renovation and want to know more about scheduling and structural considerations, check out our guide on Home Remodel planning.
Frequently Asked Questions About Budget Kitchen Remodeling
What is the cheapest way to remodel a kitchen?
The cheapest way to remodel a kitchen is to focus entirely on cosmetic updates. Painting your existing cabinets, swapping out dated cabinet hardware, installing a peel-and-stick backsplash, and adding under-cabinet LED lighting can completely transform the space for under $1,000.
Avoiding structural changes and keeping your original layout prevents the need for expensive plumbing and electrical work. For more inspiration on cost-effective updates, check out our insights on planning a Kitchen Remodel.
Can you remodel a kitchen for under $5,000?
Yes, you can absolutely achieve a dramatic kitchen remodel for under $5,000. With this budget, you can professionally refinish or paint your cabinets, install new laminate or butcher block countertops, lay down modern luxury vinyl tile (LVT) flooring, replace your faucet, and even upgrade to high-quality used or "scratch-and-dent" appliances. Doing the labor yourself will make your budget stretch even further.
Is it better to paint or wax oak cabinets?
It depends on the look you want to achieve and your patience for prep work. Painting oak cabinets with a high-quality self-leveling paint gives them a modern, clean, solid-color look, but it requires meticulous sanding and priming to prevent the heavy oak grain from showing through.
If you love the natural wood grain but hate the dated orange tone, using a tinted wood wax like Briwax is a fantastic alternative. It deepens the wood tone to a rich brown, requires no priming, and will not chip or peel over time.
Conclusion
You don't need to spend tens of thousands of dollars to fall in love with your kitchen again. By focusing on high-impact, budget-friendly updates—like painting your cabinets, upgrading your lighting, and swapping out old hardware—you can achieve a beautiful, modern space for a fraction of the cost of a traditional remodel.
While handling these cosmetic updates yourself is a great way to save money, some projects require a professional touch. Whether you need help with complex plumbing, structural layout improvements, or a complete kitchen transformation, we are here to help.
At FHG 4 LLC, we bring over 13 years of local construction experience in Upstate South Carolina—serving homeowners across Greenville, Spartanburg, Anderson, and Laurens counties. We pride ourselves on transparent communication, reliable craftsmanship, and helping our neighbors build spaces they love.
Ready to take your kitchen to the next level? Contact us today to discuss your next project, and visit our Kitchen & Bath page to see how we can bring your vision to life.


Comments